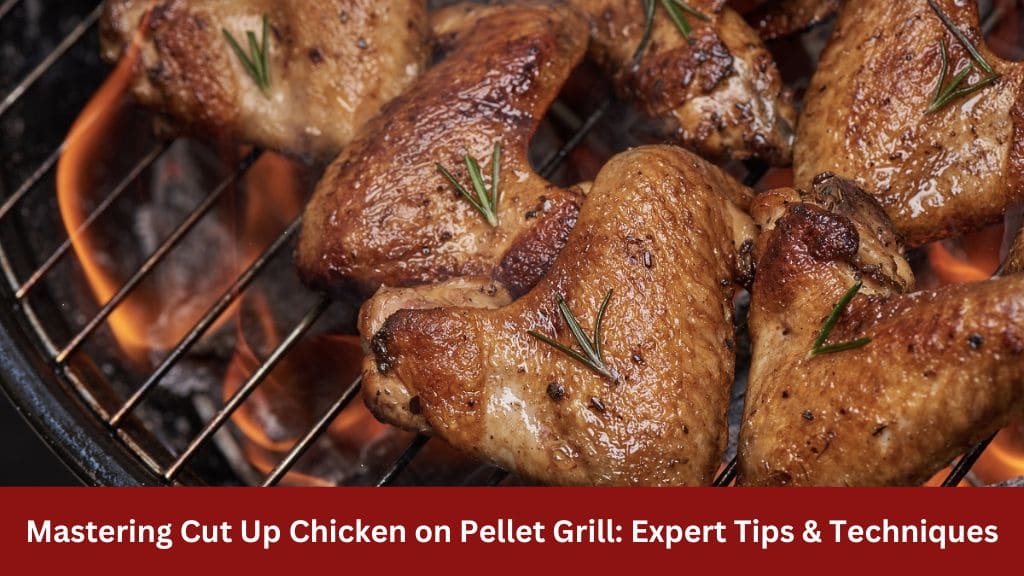
Cooking cut up chicken on a pellet grill can result in tender, juicy meat with a delicious smoky flavor. In this comprehensive guide, we’ll explore everything you need to know about preparing and grilling cut up chicken on a pellet grill, from selecting the right chicken pieces to mastering the cooking technique. Whether you’re a seasoned griller or a beginner, this guide will help you elevate your barbecue game to the next level.
Why Pellet Grilling?

1. Convenience and Consistency
Pellet grills are renowned for their ease of use and precise temperature control. Unlike traditional charcoal or gas grills, which require constant monitoring and adjustment of vents or burners to maintain the desired temperature, pellet grills feature advanced digital controllers that allow users to set the exact cooking temperature with the push of a button. This level of convenience means you can spend less time tending to the grill and more time enjoying the company of friends and family.
Furthermore, pellet grills excel in maintaining a consistent temperature throughout the cooking process. The automated pellet feed system delivers a steady supply of wood pellets to the fire pot, ensuring a consistent heat source for even cooking. Whether you’re grilling, smoking, roasting, or baking, you can trust that your pellet grill will deliver consistent results every time.
2. Versatility
One of the key advantages of pellet grills is their versatility. Unlike traditional grills that are primarily designed for grilling, pellet grills can perform a wide range of cooking techniques, including smoking, roasting, baking, braising, and more. This versatility makes pellet grills a true all-in-one outdoor cooking solution, allowing you to prepare a variety of dishes with ease.
Whether you’re smoking a rack of ribs low and slow, roasting a whole chicken to perfection, or baking a homemade pizza with a crispy crust, a pellet grill can handle it all. The ability to switch between cooking methods seamlessly opens up endless possibilities for culinary creativity and experimentation, making pellet grills a favorite among adventurous home cooks.
3. Flavorful Results
One of the most enticing aspects of pellet grilling is the exceptional flavor it imparts to food. Pellet grills use natural hardwood pellets as fuel, which infuse the food with rich, smoky flavor reminiscent of traditional wood-fired cooking methods. The type of wood pellets you choose can significantly influence the flavor profile of your dishes, with options ranging from hickory and mesquite for bold, robust flavors to apple and cherry for sweeter, more delicate notes.
The controlled combustion process in pellet grills ensures that the wood pellets burn cleanly and efficiently, producing a consistent stream of flavorful smoke without the risk of flare-ups or bitter-tasting food. Whether you’re grilling meats, smoking fish, or baking bread, the aromatic wood smoke adds depth and complexity to your culinary creations, elevating them to new heights of deliciousness.
4. Environmentally Friendly
Compared to traditional charcoal grills, pellet grills are considered more environmentally friendly due to their cleaner burning fuel source and reduced emissions. Wood pellets are made from compressed sawdust and other wood byproducts, making them a renewable and sustainable energy source. Additionally, pellet grills produce fewer harmful pollutants such as carbon monoxide and volatile organic compounds (VOCs) compared to charcoal grills, making them a greener option for outdoor cooking.
By choosing a pellet grill, you can enjoy delicious barbecue while minimizing your environmental impact and supporting sustainable practices in the culinary industry.
Selecting the Right Chicken
1. Freshness and Quality
The first step in selecting chicken for grilling is ensuring that it is fresh and of high quality. Look for chicken that is plump, moist, and free from any unpleasant odors or discoloration. Fresh chicken will have firm, pink flesh and should not feel slimy or sticky to the touch. If purchasing pre-packaged chicken from the grocery store, check the expiration date and inspect the packaging for any signs of damage or leaks.
2. Types of Cuts
There are several types of chicken cuts that are suitable for grilling on a pellet grill, each offering its own unique flavor and texture:
– Bone-in Chicken Thighs:
Bone-in chicken thighs are a popular choice for grilling due to their juicy and flavorful meat. The dark meat of the thigh remains moist and tender when cooked on the grill, making it an excellent option for barbecue enthusiasts seeking maximum flavor and succulence.
– Chicken Drumsticks:
Chicken drumsticks are another favorite for grilling, offering plenty of juicy meat on the bone. Drumsticks are easy to handle and cook relatively quickly on the grill, making them a convenient choice for backyard barbecues and cookouts.
– Chicken Wings:
Chicken wings are perfect for snacking or serving as appetizers at gatherings and parties. When grilled on a pellet grill, chicken wings develop a crispy skin and tender, flavorful meat that is sure to please even the pickiest eaters.
– Bone-in Chicken Breasts:
While boneless, skinless chicken breasts are a popular choice for grilling, they can dry out quickly if not cooked properly. Bone-in chicken breasts, on the other hand, are more forgiving and retain moisture better during the grilling process. With proper seasoning and cooking techniques, bone-in chicken breasts can be juicy and flavorful additions to any barbecue spread.
3. Organic and Free-range Options
For those concerned about the quality and source of their meat, organic and free-range chicken options are available at many grocery stores and specialty markets. Organic chicken is raised without antibiotics or synthetic hormones and is fed an organic diet, resulting in a cleaner, more natural product. Free-range chicken, on the other hand, is allowed to roam freely and forage for food outdoors, resulting in leaner, more flavorful meat.
When possible, opt for organic or free-range chicken to ensure the highest quality and most ethically sourced product for your grill. While these options may be slightly more expensive than conventional chicken, the superior taste and peace of mind they provide are well worth the investment.
Preparing the Chicken

1. Brining
Brining is a simple yet effective technique for enhancing the flavor and moisture content of chicken before grilling. Brining involves soaking the chicken in a solution of salt, water, and sometimes sugar or other seasonings. The salt in the brine helps to break down the muscle fibers in the chicken, allowing it to absorb moisture and flavor more effectively.
How to Brine Chicken:
- Prepare the Brine: In a large container, dissolve salt, sugar, and any other desired seasonings in water to create a brine solution. The ratio of salt to water can vary, but a common ratio is around 1/4 cup of salt to 1 quart of water.
- Submerge the Chicken: Place the chicken pieces in the brine, ensuring that they are fully submerged. You can use a large bowl, pot, or resealable plastic bag for brining, depending on the quantity of chicken you are preparing.
- Refrigerate: Cover the container or seal the bag and refrigerate the chicken in the brine for at least one hour, preferably longer for maximum flavor infusion. Brining times can range from one to eight hours, depending on personal preference and the size of the chicken pieces.
2. Seasoning
After brining (or instead of brining, if preferred), seasoning the chicken with your favorite rubs, marinades, or spice blends adds an extra layer of flavor to the meat. Whether you opt for store-bought seasonings or homemade blends, be sure to coat the chicken evenly on all sides for consistent flavor throughout.
Tips for Seasoning Chicken:
- Dry Rubs: Dry rubs consist of a mixture of dry herbs, spices, and seasonings that are applied directly to the surface of the chicken. Rub the seasoning blend onto the chicken pieces, pressing gently to ensure adhesion.
- Marinades: Marinades are liquid-based flavoring agents that can be used to tenderize and infuse chicken with flavor. Place the chicken in a resealable plastic bag or shallow dish and pour the marinade over the top, ensuring that the chicken is fully coated. Allow the chicken to marinate in the refrigerator for at least 30 minutes, or up to overnight, depending on the intensity of flavor desired.
3. Patting Dry
Before placing the chicken on the grill, it’s important to pat the pieces dry with paper towels. Excess moisture on the surface of the chicken can inhibit the formation of a crispy exterior and interfere with the caramelization process during grilling. Drying the chicken ensures that it browns evenly and develops a desirable texture on the grill.
How to Pat Dry Chicken:
- Remove from Brine or Marinade: If the chicken has been brined or marinated, remove it from the liquid and shake off any excess.
- Use Paper Towels: Place the chicken on a clean surface or cutting board and gently pat it dry with paper towels. Be sure to dry both the top and bottom surfaces of the chicken, as well as any crevices or folds where moisture may be trapped.
Preparing the Pellet Grill

1. Preheating
Before you start cooking, it’s essential to preheat your pellet grill to the desired temperature. Most pellet grills feature a digital control panel or dial that allows you to set the desired cooking temperature easily. Preheating the grill ensures that it reaches the correct temperature before you begin cooking, allowing for more consistent and even results.
How to Preheat a Pellet Grill:
- Turn on the Grill: Power on your pellet grill and allow it to initialize. Depending on the model, this may involve pressing a power button, turning a dial, or flipping a switch.
- Set the Temperature: Use the digital control panel or dial to set the desired cooking temperature. For grilling chicken, a temperature of around 350°F is typically recommended for even cooking and crispy skin.
- Allow Time to Preheat: Once the temperature is set, allow the pellet grill to preheat for at least 10-15 minutes, or until it reaches the desired cooking temperature. During this time, the grill will ignite the wood pellets and bring the cooking chamber up to temperature.
2. Adding Smoke Flavor
One of the unique advantages of cooking on a pellet grill is the ability to infuse your food with delicious smoky flavor. Wood pellets come in a variety of flavors, including hickory, mesquite, apple, cherry, and more, each imparting its own distinctive aroma and taste to the food.
How to Add Smoke Flavor:
- Select Wood Pellets: Choose the type of wood pellets that complement the flavor of the chicken you’re grilling. For example, hickory and mesquite are popular choices for poultry, while fruitwoods like apple and cherry impart a sweeter, milder smoke flavor.
- Fill the Hopper: Open the hopper lid on your pellet grill and pour the desired amount of wood pellets into the hopper. Most pellet grills have a hopper capacity of several pounds, allowing for extended cooking sessions without the need for frequent refills.
- Adjust Settings: Some pellet grills allow you to adjust the smoke output or intensity to control the level of smokiness in your food. Consult your grill’s user manual for instructions on how to adjust the smoke settings if desired.
3. Greasing the Grill Grates
To prevent sticking and ensure easy cleanup, it’s a good idea to grease the grill grates before cooking. This helps create a non-stick surface and prevents the chicken from sticking to the grates during grilling.
How to Grease the Grill Grates:
- Apply Cooking Oil: Using a paper towel or brush, apply a thin layer of cooking oil to the grill grates. This can be done using vegetable oil, canola oil, or any other high-heat cooking oil.
- Preheat the Grill: Allow the grill to preheat with the oiled grates in place. The heat will help the oil adhere to the grates and create a non-stick surface.
- Clean and Maintain: After each use, clean the grill grates with a grill brush or scraper to remove any residue or buildup. Reapply cooking oil as needed to maintain the non-stick surface.
Grilling the Chicken

1. Direct vs. Indirect Heat
One of the fundamental principles of grilling chicken on a pellet grill is understanding the difference between direct and indirect heat. Direct heat refers to cooking the chicken directly over the heat source, while indirect heat involves cooking the chicken away from the heat source, usually with the grill lid closed.
– Direct Heat:
Direct heat is ideal for searing chicken and creating a crispy exterior. However, it can also lead to flare-ups and uneven cooking, especially with fatty cuts of chicken. Use direct heat sparingly and monitor the chicken closely to prevent burning or charring.
– Indirect Heat:
Indirect heat is preferred for most chicken cuts, as it allows for more even cooking and prevents flare-ups. To grill chicken using indirect heat on a pellet grill, arrange the chicken pieces on the grill grate away from the direct heat source, such as the fire pot or burners. Close the grill lid to create an oven-like environment and maintain a consistent cooking temperature.
2. Monitoring Temperature
Monitoring the internal temperature of the chicken is essential for ensuring that it is cooked safely and to the desired level of doneness. Use a meat thermometer to accurately gauge the internal temperature of the chicken throughout the cooking process.
– Inserting the Thermometer:
Insert the meat thermometer probe into the thickest part of the chicken, making sure to avoid contact with bones or gristle. For bone-in cuts, aim for the center of the meat to get an accurate reading.
– Safe Temperature:
Chicken is safe to eat when it reaches an internal temperature of 165°F (75°C). However, you may prefer to remove it from the grill a few degrees earlier, as the temperature will continue to rise slightly during resting.
3. Basting and Flipping
Basting the chicken with your favorite barbecue sauce or marinade during the last few minutes of cooking adds flavor and moisture to the meat. Use a basting brush to apply the sauce evenly on all sides of the chicken, taking care not to let it drip onto the grill and cause flare-ups.
While grilling, avoid flipping the chicken too frequently, as this can disrupt the cooking process and lead to uneven cooking. Instead, flip the chicken only once halfway through the cooking time to ensure even browning and caramelization on both sides.
4. Resting
Allowing the chicken to rest for a few minutes after grilling is essential for allowing the juices to redistribute throughout the meat. Transfer the chicken to a clean platter or cutting board and cover it loosely with aluminum foil to keep it warm. Let the chicken rest for 5-10 minutes before serving to ensure maximum juiciness and tenderness.
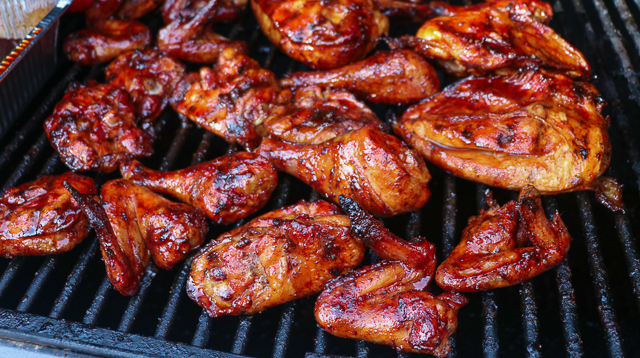
Serving and Enjoying
:max_bytes(150000):strip_icc()/BBQ_Chicken_014-52042bbd6a32499ea0f9a8cb1a227d24.jpg)
1. Resting
Allowing the grilled chicken to rest for a few minutes before serving is a crucial step that shouldn’t be overlooked. Resting allows the juices within the meat to redistribute, resulting in a more tender and juicy final product. Transfer the chicken to a clean platter or cutting board and cover it loosely with aluminum foil to retain heat while resting.
2. Slicing and Portioning
Once the chicken has rested, it’s time to slice and portion it for serving. Use a sharp knife to carve the chicken into individual portions, taking care to cut against the grain for maximum tenderness. Depending on personal preferences and serving sizes, you may choose to leave larger pieces intact or slice them into smaller portions for easier serving.
3. Presentation
Presentation plays a significant role in the overall enjoyment of grilled chicken. Arrange the sliced chicken on a serving platter or individual plates, garnishing with fresh herbs, lemon wedges, or other decorative elements for added visual appeal. Consider serving the chicken alongside complementary side dishes, such as grilled vegetables, rice pilaf, or salad, to create a complete and balanced meal.
4. Sauces and Condiments
Enhance the flavor of the grilled chicken by serving it with a selection of sauces and condiments. Offer classic barbecue sauces, homemade marinades, or flavorful dipping sauces on the side for guests to customize their chicken to their liking. Consider providing a variety of options, including tangy, spicy, and sweet flavors, to cater to different taste preferences.
5. Pairing with Beverages
Pairing grilled chicken with the right beverages can elevate the dining experience and enhance the flavors of the dish. Serve refreshing beverages such as iced tea, lemonade, or sparkling water to quench thirst and cleanse the palate between bites. For those who prefer alcoholic beverages, consider offering light and crisp wines, such as Sauvignon Blanc or Pinot Grigio, or refreshing beers, such as lagers or pale ales, that complement the flavors of grilled chicken.
6. Enjoying the Meal
Finally, sit back, relax, and savor the delicious flavors of your grilled chicken masterpiece. Encourage guests to take their time and enjoy each bite, appreciating the smoky aroma, tender texture, and mouthwatering taste of the chicken. Share stories, laughter, and good times with friends and family as you indulge in a satisfying and memorable dining experience.
Conclusion
Grilling cut up chicken on a pellet grill is a rewarding and flavorful experience that anyone can master with a little practice and know-how. By following the tips and techniques outlined in this guide, you’ll be well on your way to becoming a grill master in no time. So fire up your pellet grill, gather your ingredients, and get ready to enjoy the mouthwatering taste of grilled chicken like never before!